Seattle Decks and Roof Decks
With Seattle hills and amazing views, we often find we are reaching higher to capture those views. A deck addition or roof deck can be a wonderful and useful space – or a complete nightmare (if it leaks). Here are some tips to do it right the first time.


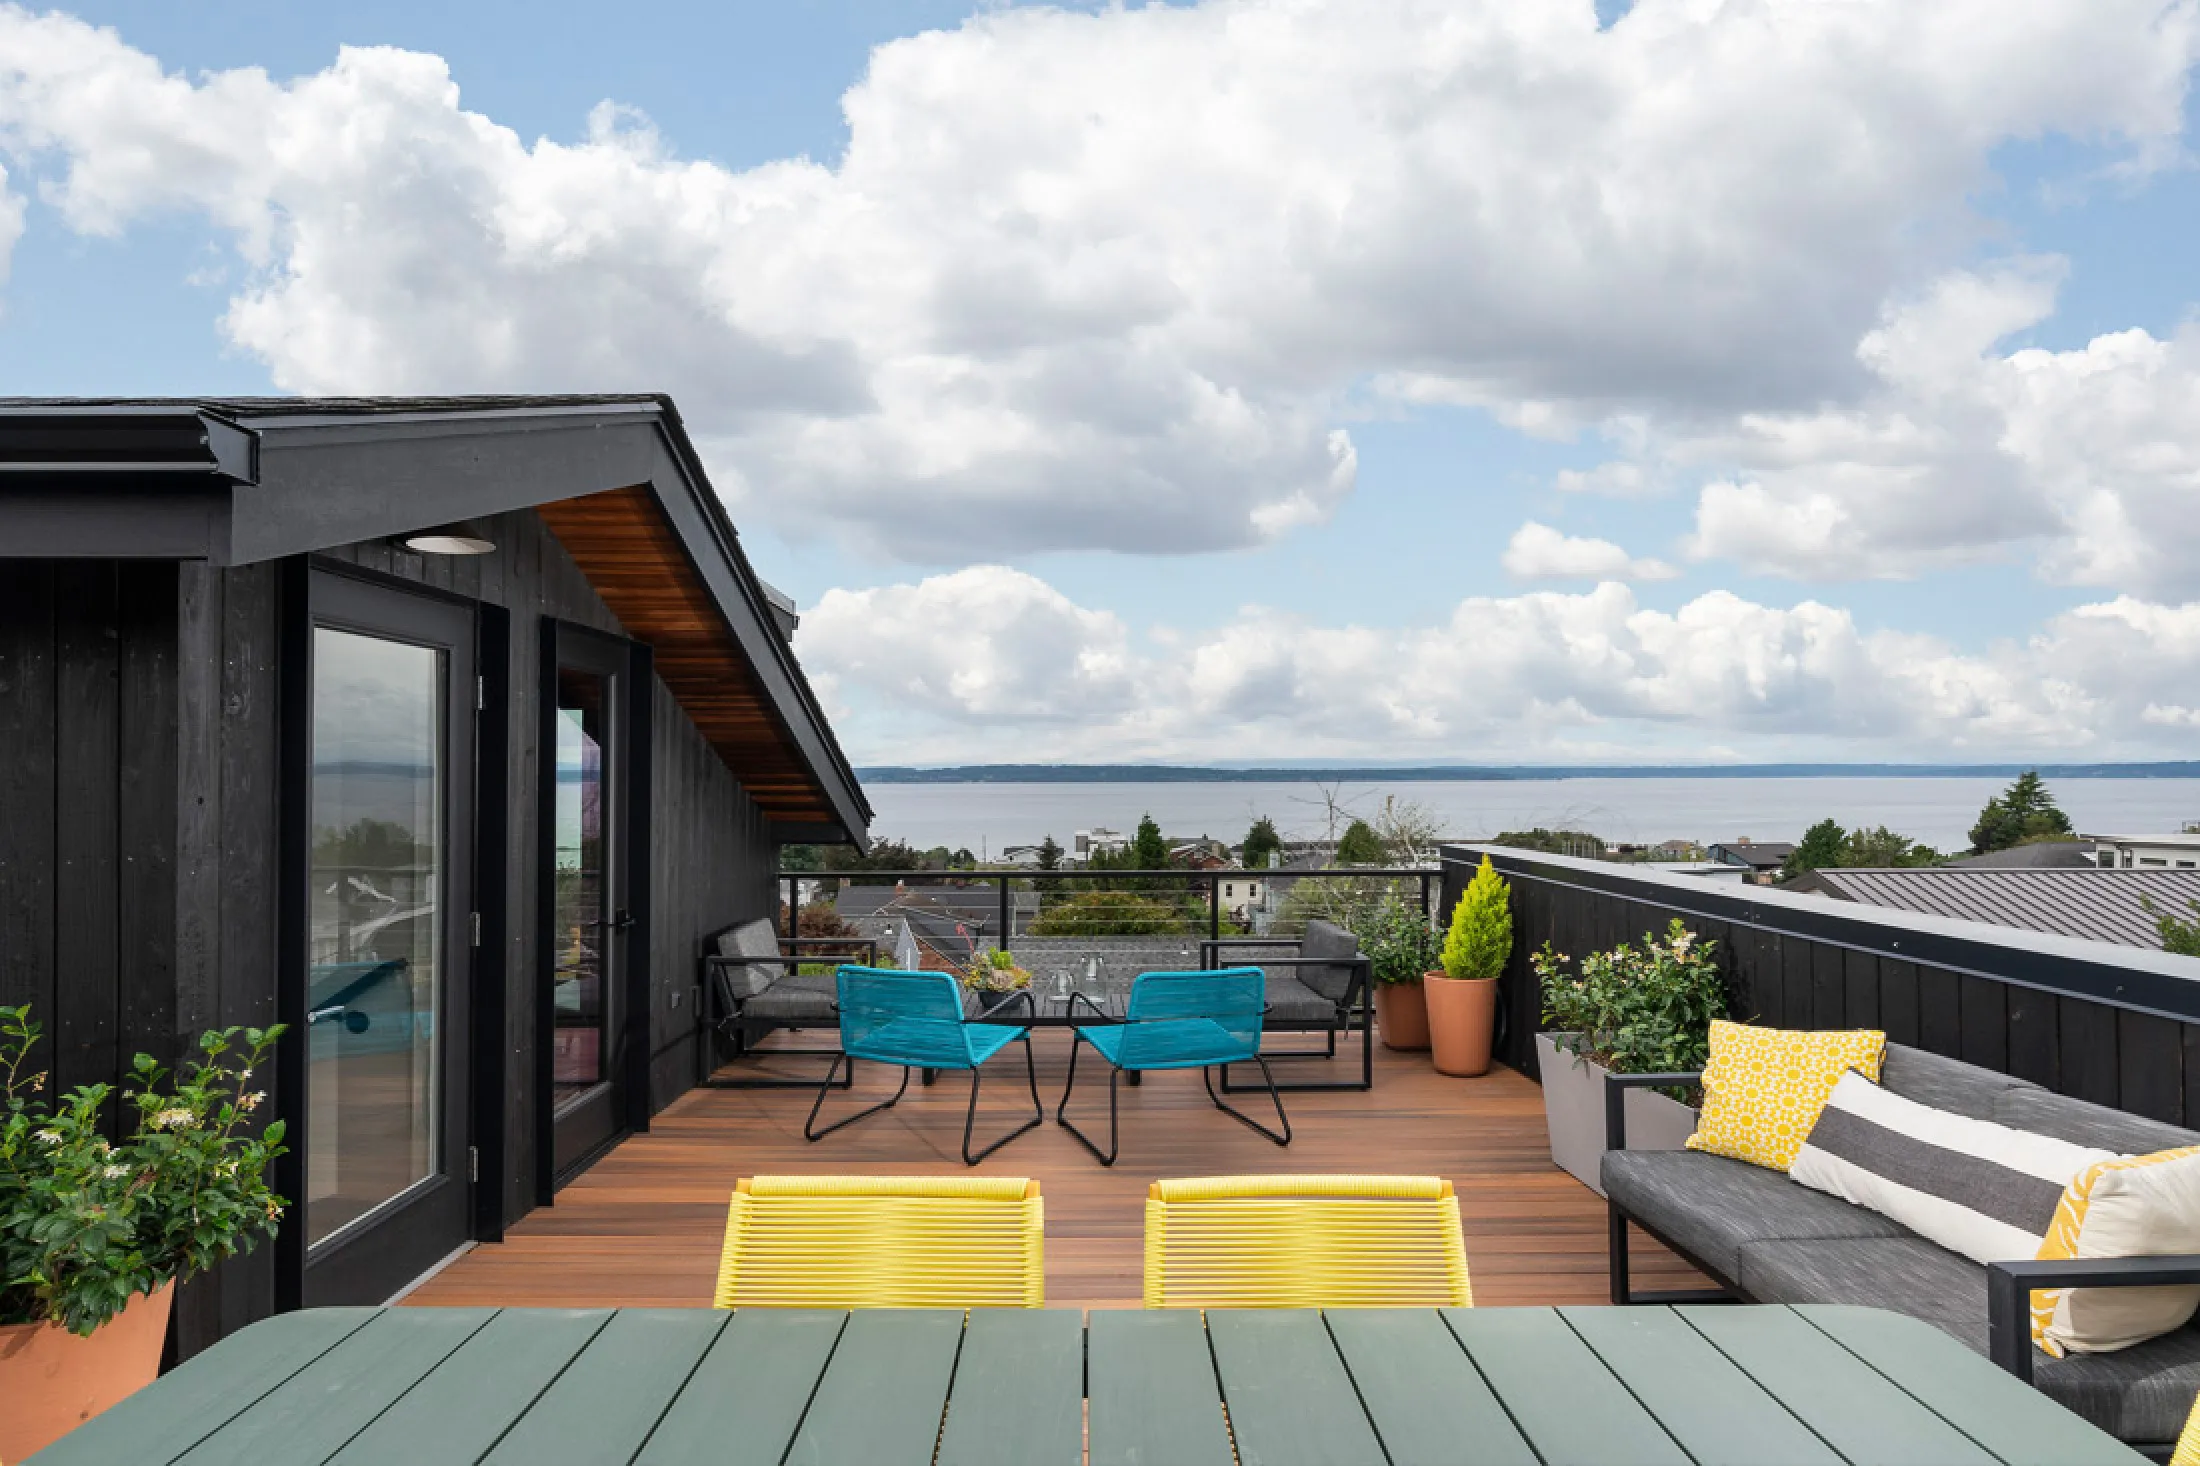
Deck and Roof Deck Photos
Roof deck construction methods have to be top-notch, otherwise they leak. If you skimp on materials, get waterproofing or flashing details wrong, or choose a low quality roofing product, your roof deck is almost guaranteed to leak. However, if you do things right, you will get a roof deck that is worry free, apart from a recommended annual inspection of waterproofing surfaces for damage or wear.
Starting the design process of a roof deck
We typically start the design process by making sure that the land use code allows for the construction of the roof deck. Most jurisdictions will have rules about how high a building can be constructed, so it’s important to figure this out before proceeding too far with the design. It may also be necessary to obtain a survey of your property to be able to show the building department that you are within the allowable height limit. After determining that the project is allowed by the land use code, we’ll typically analyze the existing building to see if it looks feasible to add a roof deck. This may mean reinforcing or replacing the structure, or adding the new members on top of the old to create a new walking surface.
Waterproof deck surfaces for a roof deck
There are many options for waterproofing your deck, but only a few rise to the top for our consideration. There are two general directions to proceed when choosing the waterproof surface 1) an integrated walking and waterproofing surfaces or 2) a separate waterproofing surface with a raised walking surface above it.
Integrated walking and waterproofing surfaces are typically applied over a carefully constructed plywood deck surface that slopes toward drains at a minimum slope. While there are liquid applied options that rely on a thin membrane to waterproof the deck, generally we avoid these, as they tend to get damaged and need recoating more frequently. The product we favor is a fiberglass deck surface (or similar type of material). To improve the appearance of this product, tile can be installed over it, if desired. In any installation that integrates the walking surface with the waterproofing surface, it’s very important that the structure and plywood decking be very solid, and all joints align correctly. Drains and scuppers need to also be waterproofed correctly, as they are often a source of leaks.
Separating the walking and waterproofing surface allows for the use of a greater variety of decking and waterproofing products. The big downside of this type of system is that occasionally you will need to lift up the walking surface to clean under it. For many installations this is fine, but if you have trees overhead that drop leaves and pine needles on the deck, we typically recommend sticking to an integrated walking surface with waterproofing so that it is easily cleaned off.
If you do decide to pursue a separate decking and waterproofing surface, we recommend choosing a roofing membrane that has a long life, welded seams, and a good track record for performance in low slope applications. A system that includes drains and scuppers, and flashings is also preferred over systems that combine parts from other companies. In a heat welded application drains and scuppers become part of membrane, and if installed correctly the system should provide years of leak-free performance.
On top of this waterproofing surface, you can choose to construct a platform with wood decking or other decking materials, or use a pedestal system that supports stone or concrete pavers. The deck design will need to allow for the added depth and weight of this system.
Choosing railings for a roof deck
The point of adding a roof deck is almost always to access views, so consider the type of railing you choose to install. Often we choose an aluminum and glass railing system, since the glass allows for unobstructed views while also aiding in blocking the wind. In Seattle’s climate, often the wind can be chilly and make even a sunny day feel cold!
Other railing choices that don’t obstruct the views are stainless steel cable railing and custom metal railings. Wood railings are usually not the best choice since the wood members often will need to be rather large, which block views, while also requiring the most maintenance. If you must have wood railings (to fit into the aesthetic of the house) consider Ironwood (like Ipe) railings that can be left unsealed, and will develop their own protective coating as they age. The wood will turn from a beautiful teak color to silver/gray in the process. You can keep the wood from graying by applying sealant every year, but I rarely find clients keep this up beyond a year or two.
How the railings attach is also very important. Generally we try to find an attachment method that allows for the railing to be bolted to the side of the wall, rather than the top of the wall, where flashing would normally be located. This allows for a metal wall cap to be installed without penetrations that could leak.
Typical railing height for residential construction is 36 inches high. This is also the minimum required height, which some people will find feels too low, especially when there are children in the household. Consider bumping the railing height up to 40 to 42 inches if 36 inches feels too low, but be careful about where the top rail ends up when seated. If the top rail is in your line of sight of a special view, you may not like the result.
Roof deck access
The best way to access the roof deck is by a regular stair case inside the house that comes up to the roof through a regular size exterior door. Unfortunately, this isn’t always possible to achieve, especially if land use codes don’t allow for the extra height of an enclosed stairway. Other options include creating a deck on the level below and adding an exterior stair (perhaps a spiral stair) to the roof, or using specially designed roof hatches that swing wide open and have pistons to hold them open (like the trunk of a hatchback car). Generally we find that the easier it is to access a roof deck, the more it will be used. And that’s the point of adding a roof deck- it’s not always an easy project to construct, but it’s a special feature of the house that will get a lot of use over the years.